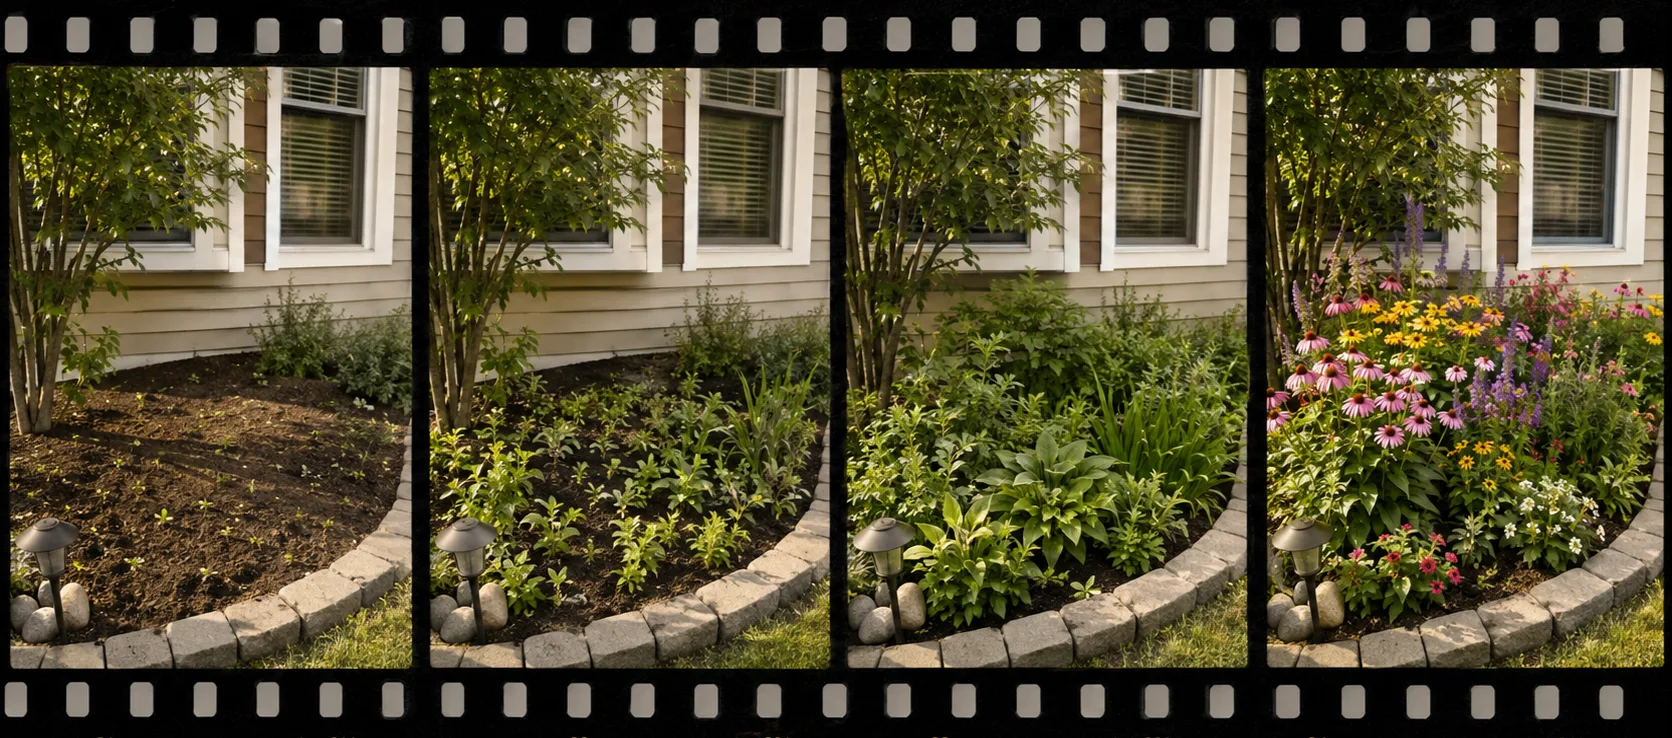
A plant timelapse is just a series of photos taken from the exact same spot on a regular schedule, played back fast enough that you can see growth happen. A seedling pushing up through soil, a flower opening, a whole garden bed filling in over a season, all in a few seconds of video.
The idea is simple. The hard part is keeping the camera perfectly still, the light consistent, and the schedule going for days or months. This guide walks through how to do that with gear you probably already have, then shows the hands-off way to do it for an outdoor garden.
What you need
- A camera that can stay in one place for the whole project. An old phone, an action camera, a DSLR, or a security camera all work.
- A way to take photos on a schedule: an intervalometer app, a camera's built-in interval mode, or software that captures for you.
- Steady light, or at least light that's the same at every capture.
- A way to stitch the photos into a video: a timelapse app, a video editor, or a free command-line tool.
Step 1: Pick your camera
An old phone is the easiest start for indoor projects. Install an intervalometer or timelapse app, plug it into a charger, and mount it on a cheap phone tripod or clamp. Many timelapse apps export the video for you at the end.
An action camera or DSLR gives you better image quality and usually has a built-in interval mode. You'll need external power for anything longer than a few hours.
A security camera is the best fit for an outdoor garden. It's already mounted, already weatherproof, already powered, and it isn't going anywhere for months. You just need software that pulls a still from it every day. That's what Greenlapse does with Ring cameras.
Step 2: Lock down the angle
Every frame has to come from the same position. Move the camera half an inch between shots and the whole video jitters.
- Use a tripod or clamp you won't need for anything else during the project.
- Tape down the tripod legs, or mark where they sit, so a bump doesn't ruin the sequence.
- Frame loosely. Plants grow up and out, so leave room above and around them.
- Lock focus and exposure if your camera or app allows it. Auto-exposure makes frames flicker.
Step 3: Choose your interval
The right interval depends on how fast your subject changes. Some starting points:
- Seeds sprouting: one photo every 15–30 minutes, for 1–2 weeks.
- A flower opening: one photo every 5–10 minutes, for 1–3 days.
- A houseplant turning toward the light: one photo every 15–30 minutes, for a few days.
- A garden bed over a season: one photo a day, for 2–6 months.
Do the math backwards from the video you want. Video plays at 24–30 frames per second, so a 10-second clip needs roughly 240–300 photos. If you're capturing once a day, you'll have fewer frames than that, so play them back slower (10–15 frames per second looks good for daily garden shots).
Step 4: Keep the light consistent
Lighting is what separates a smooth timelapse from a flickering one.
Indoors, a grow light on a timer is your friend. Window light changes through the day and with the weather, which shows up as flicker. If you shoot around the clock, either keep a light on for every capture or skip the night frames.
Outdoors, capture at the same time every day. Midday works well because shadows are short and they move the least from one day to the next. Cloudy and sunny days will still look different, and that's fine. Just remove any frame that's badly off.
Step 5: Turn your photos into a video
If your timelapse app exports a video, you're done. Otherwise, you have a folder of photos to stitch together:
- Video editors like iMovie, DaVinci Resolve, or Premiere can import an image sequence and export it as a video.
- ffmpeg is free and fast if you're comfortable in a terminal. With photos named in order (
img_0001.jpg,img_0002.jpg, …), one command does it:
ffmpeg -framerate 24 -i img_%04d.jpg -c:v libx264 -pix_fmt yuv420p plant-timelapse.mp4Before you render, scroll through the frames and delete the bad ones: a bumped camera, a hand in the shot, a delivery truck parked in front of the garden. A few missing frames are invisible in the final video. A few bad ones are not.
The hands-off way: Greenlapse for outdoor gardens
The DIY approach works, but for a garden that you want to follow over a whole season it asks a lot: a camera you can leave outside for months, power, weatherproofing, and remembering to collect and clean up the photos. Most people don't make it to the end.
Greenlapse handles both the consistency and the duration problem for you.
With a Ring camera, Greenlapse connects to the camera you already have pointed at your yard and captures your zone once a day around noon. You don't lift a finger. See our Ring camera guide for setup, and where to point the camera.
Without a Ring camera, Greenlapse can guide you to line up manual photos in the same position over time. Set a reminder for any time of day, week, or month, and the app nudges you when it's time to take the next photo.
Either way, Greenlapse automatically generates your first timelapse after about 20 captures. After that, making a new one takes about a minute:
- Open your zone, go to the Watch tab, and select “Generate New Timelapse” from the Capture Activity widget.
- Pick a date range. The last month, a whole season, or since day one.
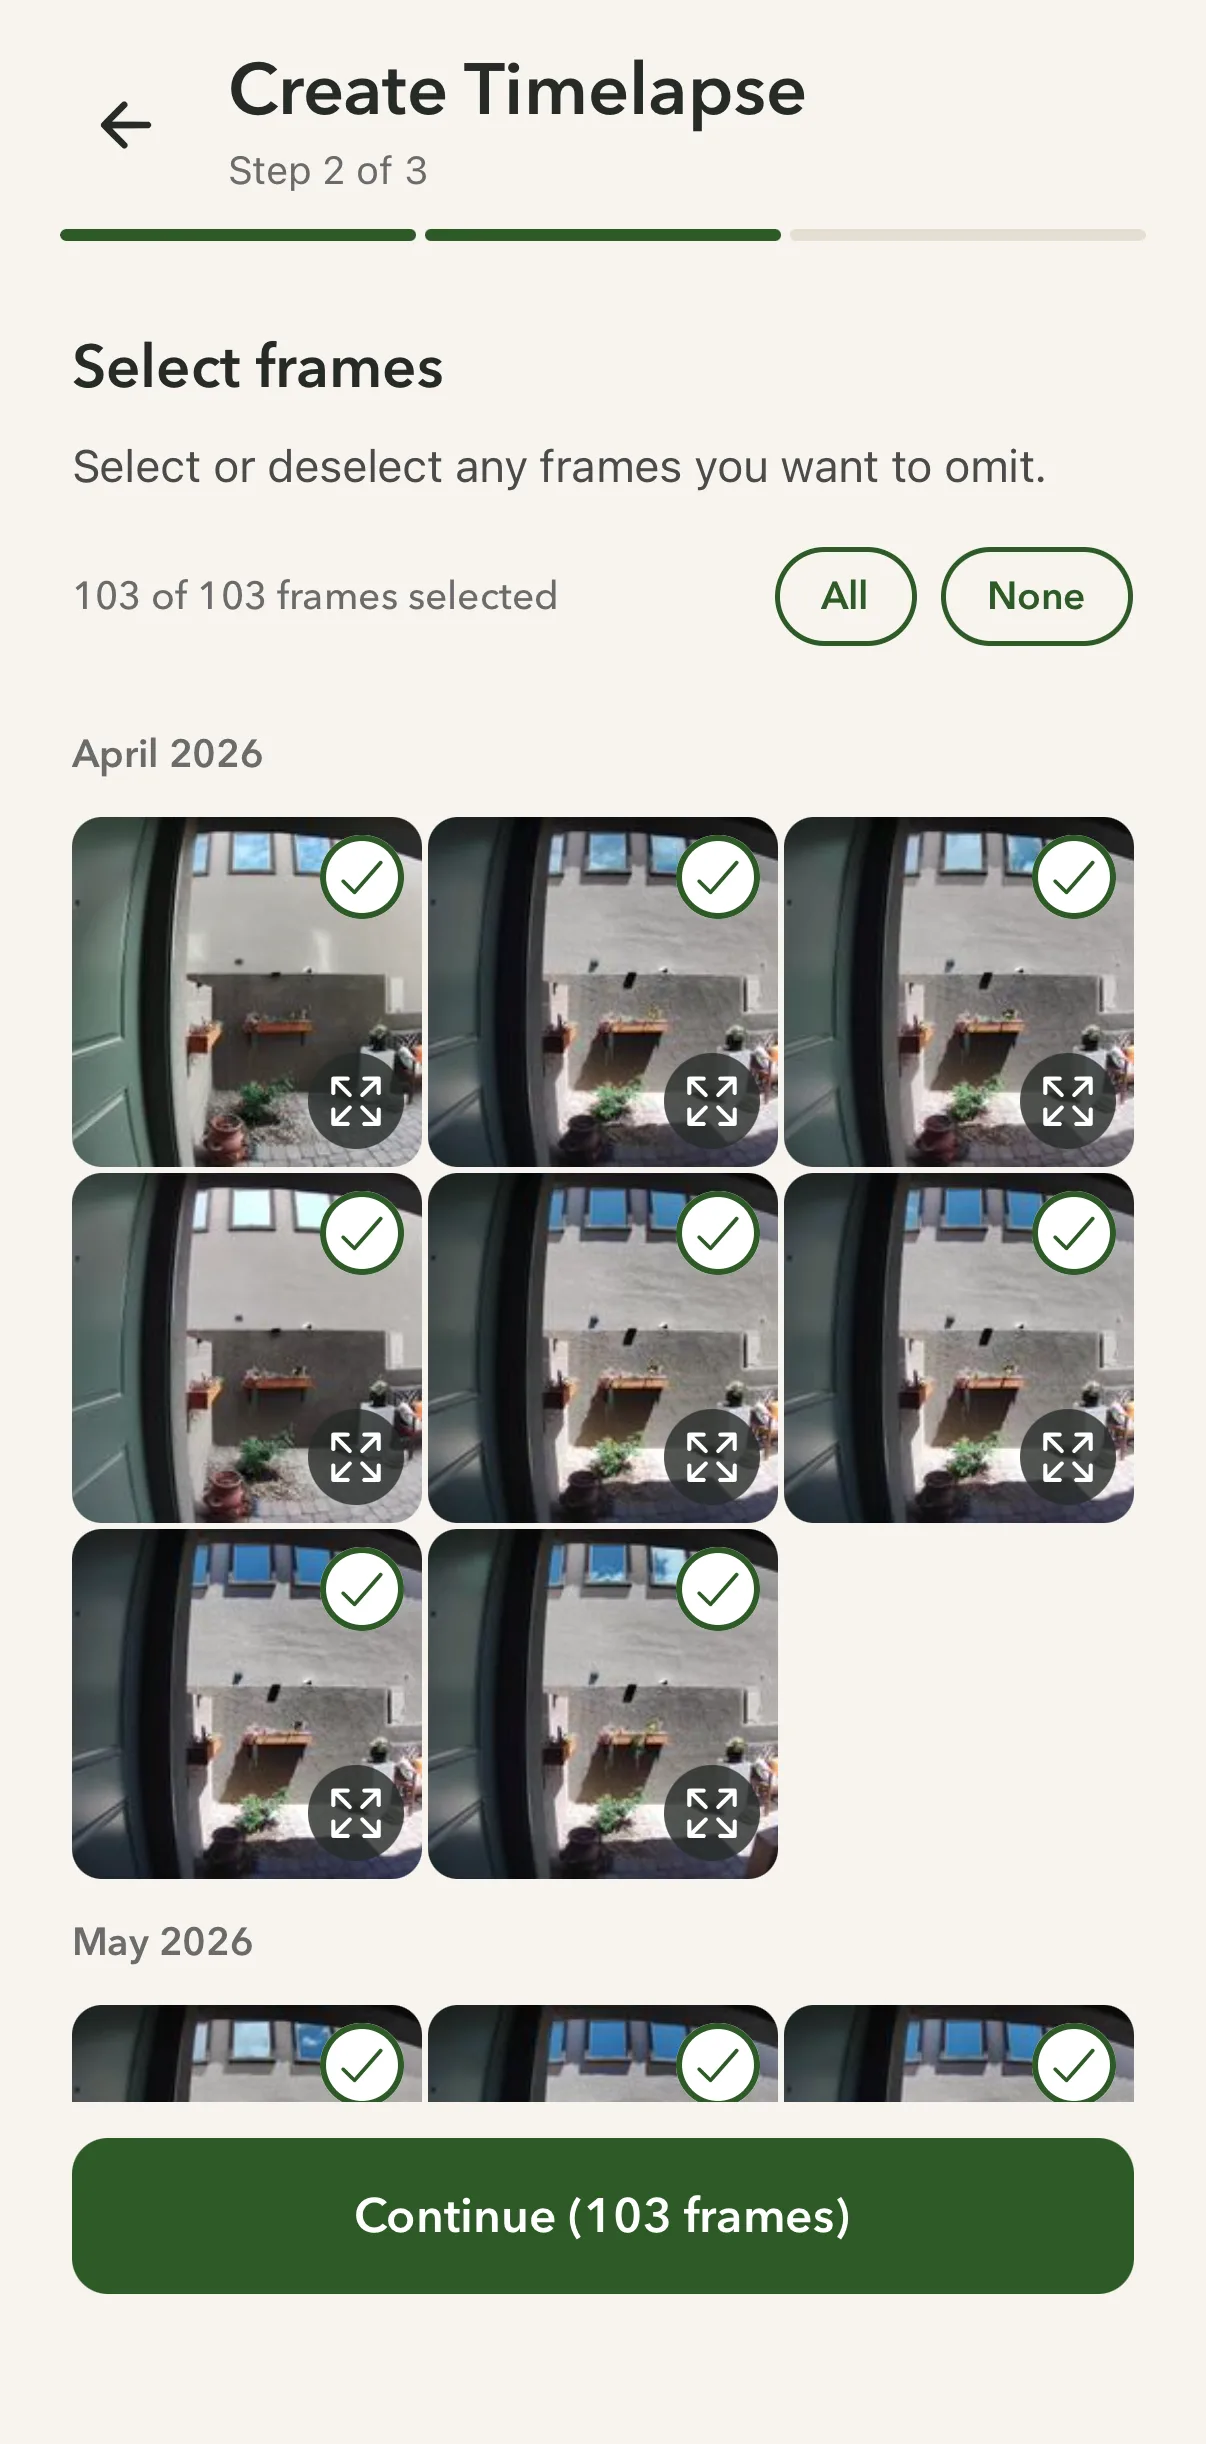
- Clean up the frames. Greenlapse shows every capture in the range, so you can remove any that turned out badly.
- Adjust the playback speed. Faster settings make a shorter, punchier clip; slower ones stretch it out.
- Hit generate. It renders in the background, usually within a minute. Wait in the app, or close it and get an email when it's ready.
The result is an MP4 you can save to your camera roll, send through the share sheet to iMessage, Instagram, or a family group chat, or just rewatch in the app any time. It matches your camera's aspect ratio, so Ring timelapses look natural on desktop or in landscape social posts.
Plant timelapse FAQ
How often should I take photos for a plant timelapse?
It depends on the plant. Fast changes like a flower opening need a photo every 5–10 minutes. Seedlings look good at every 15–30 minutes. For a garden over a full season, once a day is plenty.
How long does it take to make a plant timelapse?
As long as the growth you want to show. A flower opening takes a day or two. Sprouting seeds take a week or two. A garden bed filling in takes a few months, which is why an automatic setup helps so much.
Can I make a plant timelapse with my phone?
Yes. Mount the phone where it won't move, keep it plugged in, and use a timelapse or intervalometer app. It works best indoors over days or weeks. For months outdoors, a weatherproof camera that's already mounted is more practical.
Can I use a security camera for a plant timelapse?
Yes, and for an outdoor garden it's often the best option, since it's already mounted, powered, and weatherproof. If you have a Ring camera, Greenlapse captures your garden once a day and builds the timelapse for you. Here's how to set it up.
What frame rate should a plant timelapse use?
24–30 frames per second if you have hundreds of photos. With fewer, like a season of daily captures, 10–15 frames per second gives the video enough length to actually watch the growth.